
How to backup your VMware Autolab
What is an Autolab some may ask? Well, Autolab is a lab builder kit is designed to produce a nested vSphere 5.1, 5.0 or 4.1 lab environment for use in the home or office lab. It comes with prebuilt open source VMs and automation scripts to allow you to setup/configure your lab with very little efforts. You still of course will need trial or valid copies of OSs like vSphere, Win2003, Win2008, WinXP, VMware View, etc to be able to build it out for your needs. The lab documentation outlines this quite well. The lab install is delivered in a nicely packed vApp which is easy to manage. Thanks go out to Alastair Cooke for developing this great system along with other top virtualization minds.
Well after using this lab setup for about 2-3 weeks I ran into an issue on my Lab ESXi box…my 60 day trail was about to end soon. Crap, what to do now. Well this post describes the 1st part of that experience where I will show you how I have done a backup/export of my already configured Autolab. The next post will hopefully show you how I have imported that config back into my vCenter on the ESXi server.
Exporting your Autolab:
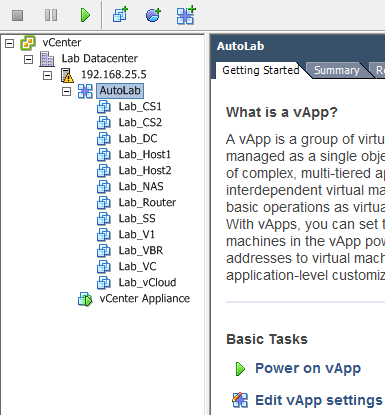
1) View your Autolab structure within the vSphere client (My ESXi is ver 5.0 right now) and make sure you shut it down.
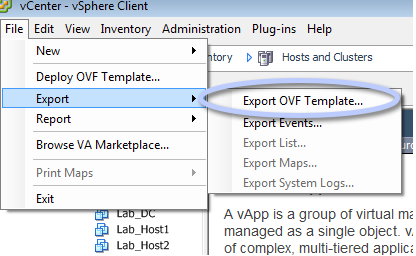
2) Next you will export the vApp to an OVF Template. Be sure to have an easy location on your local disk to save this export.
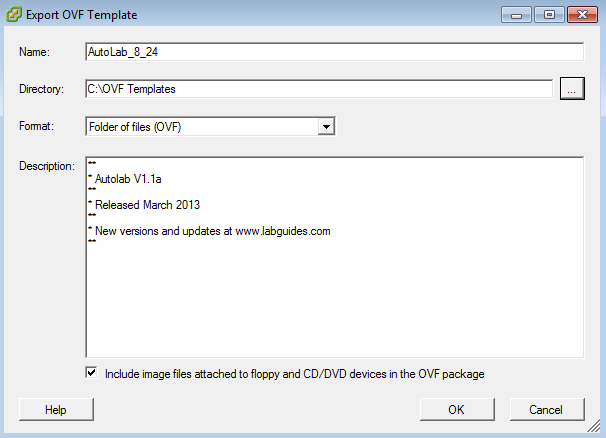
3) Fill out the Export OVF Template screen. Note that you can choose 2 types of export Formats, “Folder of files (OVF)” which stores the OVF template as a set of files (.ovf, .vmdk, and .mf) OR “Single file (OVA)” to package the OVF template into a single .ova file. Either option will work and the choice is yours depending on how you want the exported structure. I would do the OVA format if you just want that single file to pop around on USB drives in the lab. For the purpose of this post I have done an OVF.
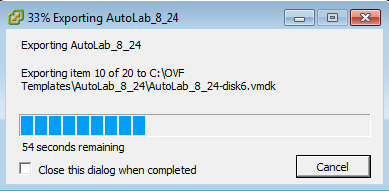
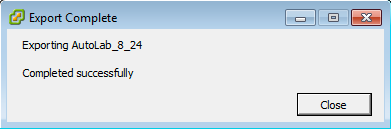
4) Wait for it, wait for it…
5) Done.
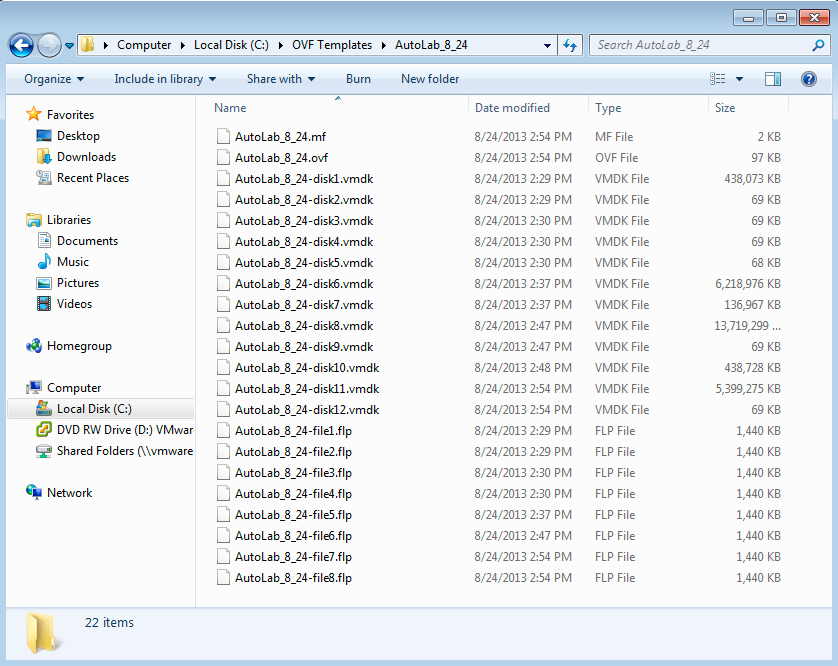
6) Review the exported contents
And that is really all it takes to back up or export the Autolab for portability.
**I will note that you should always make sure the CD/DVD of each VM in the lab is not pre-mounted with an ISO of some sort because the export will try to include those images in the OVF Package and this will increase your file sizes more than you would like. This also holds true for Floppy images which you may wan to leave attached to the VMs. See the check box in step 3’s image “Include the image files attached to…”**
Please consider sharing this post with the tools below!